Today I have a post inspired by my NYX Micro Brow Pencil review from earlier this week. In the "before" photos I took, I only had on foundation, concealer, and powder. I noticed while going through those pictures that you could hardly see my undereye circles. It was that moment when I realized that I had found something great, and that I needed to share it with the internet. The best part? Everything I'm using you can get at affordable prices!
At this point, you're probably dying to know what I'm going to say I discovered (maybe, maybe not?) so let's get right into it~
What you're going to need:
- A moisturizing eye cream
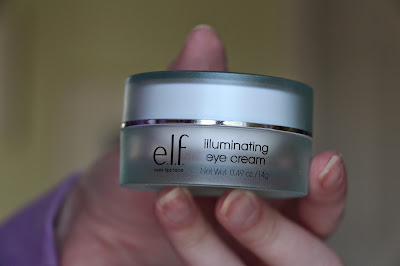
You're going to be seeing a lot of e.l.f. products in this how-to. What can I say? They have some great stuff that really works for me. The e.l.f. Illuminating Eye Cream has been great for me (retail: $10). I have really noticed a difference in my eye bags and texture of my undereye area. I use this at night, and in the morning before I put on makeup. It works well to prime the undereye area, just make sure to let it sink in for 5-10 minutes before moving on to makeup
- A concealer made for the eye area
The NYX Dark Circle Concealer/Corrector is definitely the star of the show. This is a pretty new product for me, but it has definitely knocked my socks off. This is made with coconut oil, so it has a light, moisturizing consistency that is perfect for the undereye area. I have the shade fair which is a pale, salmon-tone concealer. I find that I don't have to layer another concealer over this because while it has a correcting tone, it doesn't look like a corrector on the skin. When blended out, it just looks like I have no blueness! This retails for $6.99 at Ulta and on the NYX site.
- A setting brush
It doesn't have to be a fancy brush labeled for setting, I just recommend getting a smaller brush with really soft bristles. I love the e.l.f. blush brush because it's a great shape for diffusing powder under your eyes, it's really soft, and it's only $3.
- A setting powder
Yet another e.l.f. product, we have the HD Undereye Setting Powder. This product is super finely milled and has a slight pink tint with some very small pieces of glitter that don't show up on the skin. Having a setting powder helps the concealer to not crease; this one in particular also draws light to the area, making it brighter. This product also retails for $3 and can be found at Target and some Walmart locations.
I won't have any pictures applying eye cream, as I had already done so earlier that morning, so we are going to jump to concealer.
Before concealer
Right eye, pre-concealer
I started by swirling my finger around in the NYX concealer pot. I then transfer the product to my eye area by tapping gently with my ring finger.
This is just the concealer pre-blending to show the color. After applying with the ring finger, I usually blend it out in tapping motions with my middle finger.
This is my right eye after blending
Ugh, the camera focused on my eye instead of the brush -_- Basically, you want to get a very minimal amount of the powder dispersed on your brush as much as possible so it will transfer to your eye evenly.
See how great the shape of this brush is for the under-eye area?? Just gently tap-then-sweep the powder on your eye area.
Like so.
RECAP:
Before concealer
After concealer
After concealer and powder
That's all for today! I hope you found this how-to helpful. Comment down below to let me know if you have any tricks that work well for your dark circles-I'd love to try any new techniques out. Thank you so much for taking the time to read this :)
Also, if you want to stay updated on when I make a new post, follow me on Bloglovin (LINK)-you'll get a little notification when my posts go up!
Have a beautiful day~


No comments:
Post a Comment